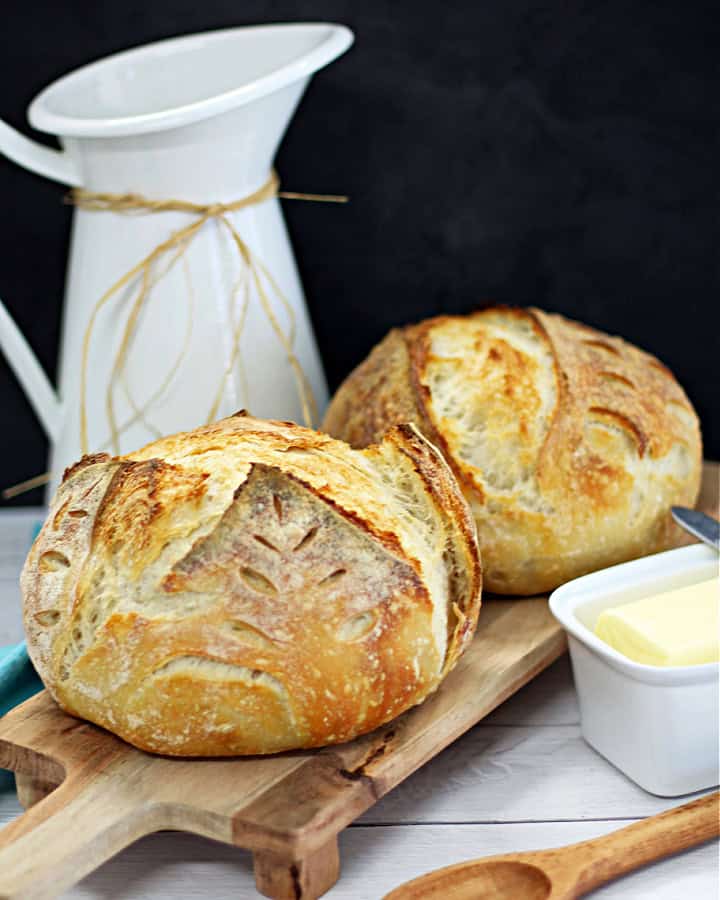
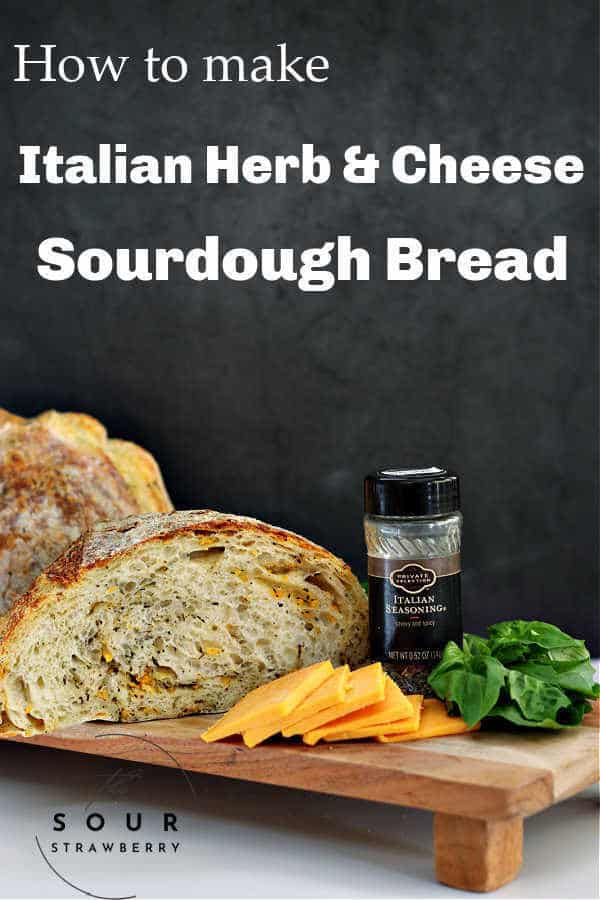
Italian Herb and Cheese Artisan Sourdough Bread
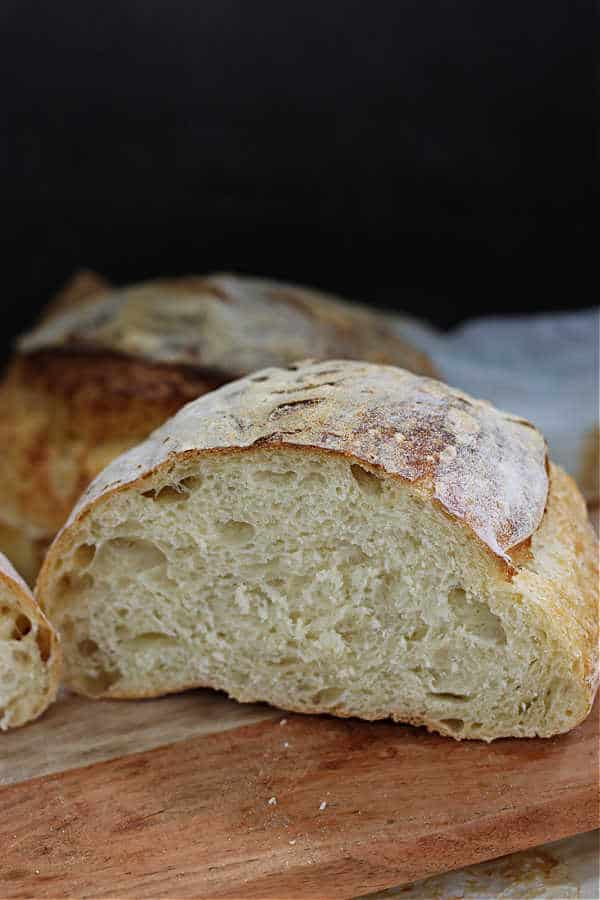
This herby, cheesy inclusion loaf will change your life. It’s a soft, aromatic bread with a light yet crispy crust that’s as delicious on its own or surrounding your favorite sandwich ingredients. This is probably the easiest inclusion recipe you will ever try. It’s beginner-friendly and versatile, perfect for first-timers starting their inclusion journey.

If you already have a tried-and-true sourdough recipe, then just use it and add the inclusions.
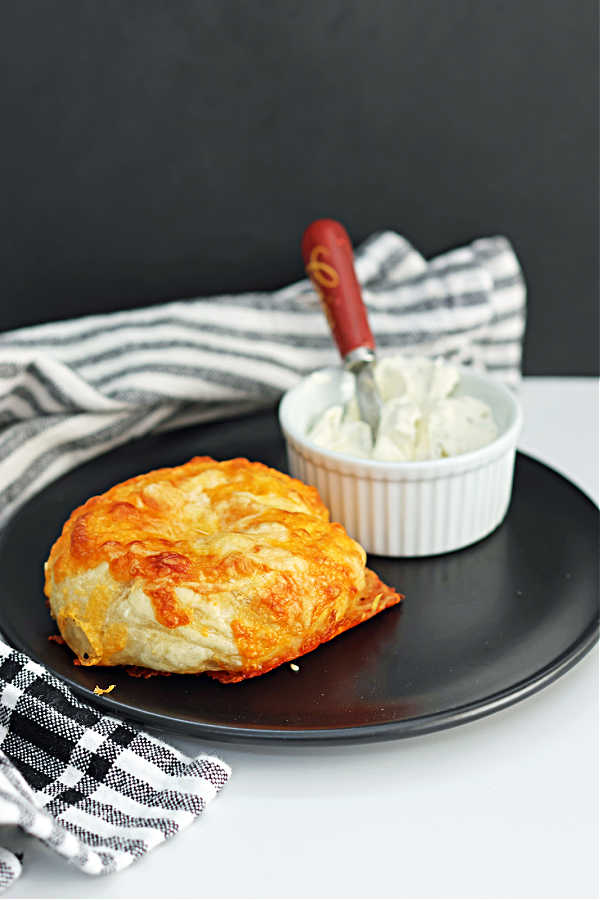
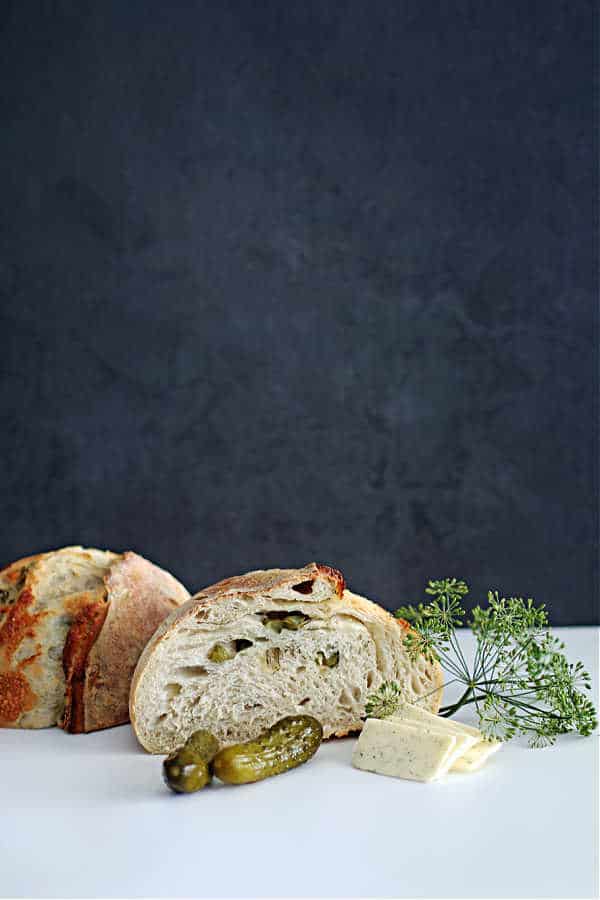
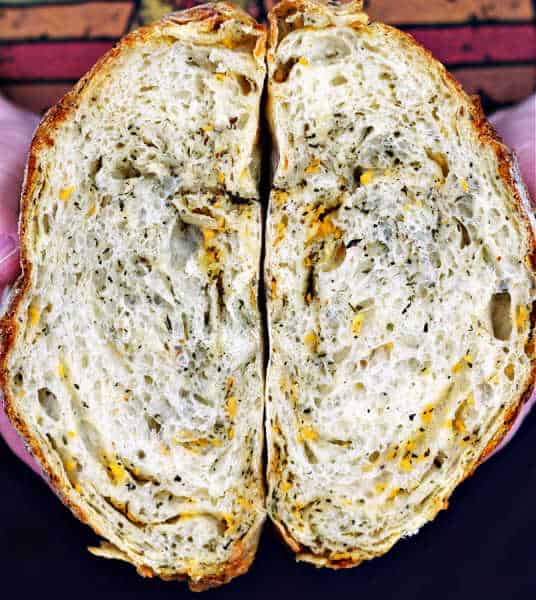
Once we pulled this out of the oven, Ian and I had a terrible time waiting two hours to cut into it (we didn’t, haha). It smelled so good we just couldn’t. It tastes just like it smells AMAZING. it’s awesome, naked or with a bit of butter. (ok, who are we kidding – a LOT of butter). It’s also amazing dipped in Olive Oil and Balsamic Vinegar. I had to bake a second loaf to get a sandwich though, haha.
Why You will Love this Recipe:
It’s EASY: – If you are just starting your sourdough journey and diving into inclusions, this is a great bread recipe for you. It’s simple, not messy, and not complicated. You just toss in the cheese and Italian herbs, and you are good to go.
AMAZING Flavor: THIS BREAD makes the perfect Italian Herb Panini Sandwich, or any other sandwich for that matter.
DELICIOUS on its own: As I said, we ate the entire first loaf standing around the kitchen island. A little butter? Yes. Dipped in olive oil/balsamic vinegar? You bet!
Ingredients for the Italian Herb and Cheese Artisan Sourdough Bread:
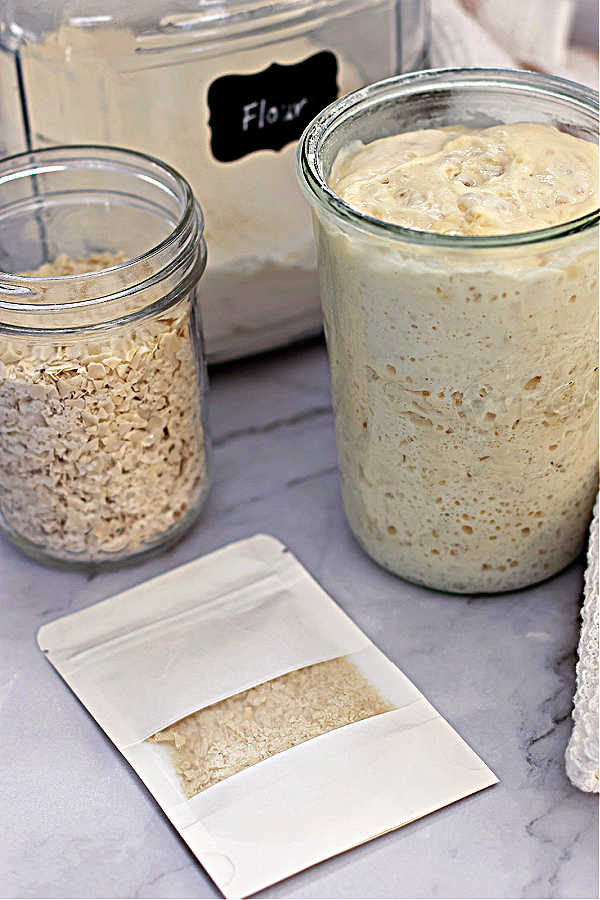
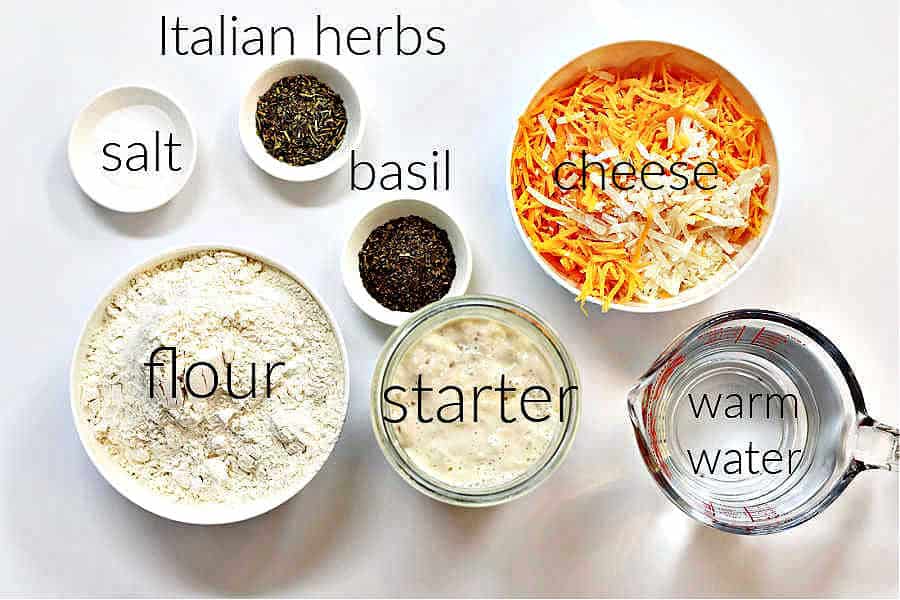
Active Starter: Make sure to use an active sourdough starter. You want it well-fed, happy, healthy and peaked. It’s the leaven for this dough.
Bread Flour: Unbleached if possible, or all-purpose flour, both work. You can also add a bit of whole wheat flour to this recipe if you like. (50g – if you do, then reduce your bread flour by 50g also).
Warm Water: You want lukewarm water. Water over 120°F can kill your sourdough starter. Cold water slows down your rise. We live in the city, so I use Brita-filtered water.
Salt: We use sea salt.
Italian Seasoning: A mix of oregano, basil, thyme, rosemary, marjoram, and garlic powder. The fresher the better.
Additional Basil: We are heavy into basil around here, fresh or dried. I currently have 3 plants in my art studio, haha and we feed off them almost daily. I did add extra dried basil to this bread recipe.
Cheddar Cheese: Cheese is expensive, so I mostly use whatever is in the fridge. This week, it was a sharp cheddar. Colby Jack works, as does anything you have provided you are shredding it from a block. Don’t buy pre-shredded with its anti-caking ingredients, it doesn’t melt well during the baking process.
Parmesan Cheese: I used Parmigiano-Reggiano cheese – don’t skimp here. Buy a good-quality wedge and grate it. Your taste buds will thank you. Asiago Cheese, one of my favorites, also works, as does Monterey Jack. Try other types of cheese in the recipe to find your favorites.
FRESH herbs: If you are using fresh herbs, double the amounts suggested.
Pin this image to save for later
How to Make Italian Herb and Cheese Sourdough Bread (Video Tutorial).
This YouTube video walks you step-by-step through this bread recipe. (Except for us devouring the loaf at the end. That just wasn’t pretty, haha).
When I started my sourdough bread journey, I wished for step-by-step videos; that’s why I make them for you. They are a great reference point if you get stuck in the recipe or just need a visual.
Warning: I break sourdough rules: I have dummied down a lot of those silly rules.
- I use whatever bowl I want to mix my dough. Lately, it’s a $5.00 glass bowl from the Dollar Store (I used metal bowls for years), but I like to see the bottom of my bread during the fermentation stage; as it tells you a lot about what’s going on.
- I use the end of a wooden spoon to mix my dough, not that special weird-shaped whisk, because, HELLO, that thing is a bear to get clean.
- I do use a kitchen scale because I like to measure in grams. It’s more accurate than cups and teaspoons and I want the best results possible for my bread.
- I cover my starter with a paper towel lid—yes, I own this. It’s alive; it needs to breathe. I add the glass lid to weigh down the paper towel, which is placed on an angle to let air in.
I guess the message here is – Don’t listen to all the crazy – Do what fits into your life, use what you have – and have fun. After all – we are JUST MAKING BREAD.
Sample Timeline for Baking the Italian Herb and Cheese Sourdough Bread:
Since I work from home, I have built a schedule that fits around my workday. Many people have asked for a schedule for people who “go to work,” so here’s one for you guys.
Day 1 – 7:00 a.m. (or whenever you get up).
Feed your Starter: – try a 1:2:2 ratio (or higher) to slow down the process a bit. You want your starter to peak about the time you get home from work. Feeding and the room temperature in your home will affect this.
Example: I feed at 8 a.m. and start mixing my dough at 4:00 p.m. I feed a 1:1:1 ratio. Our house is around 70°F, and it usually takes about 8 hours to hit the peak. Adding additional flour and water (ex. 1:2:2 ratio) slows this down a bit and can get you to 6:00p.m. – 7:00 p.m.
1:2:2 ratio example. 50g starter – 100g warm water,- 100g flour
Day 1 – 6:00 p.m. – arrive home – Mix your dough. Add your active starter to a large mixing bowl, then your warm water. Mix until combined. Add your flour and salt (yes, at the same time – another rule I break). Mix to a shaggy round ball, cover and let sit for 30 minutes.
Day 1 – 6:30 p.m. – First set of stretch and folds. – Once done, shred the cheese and measure out the Italian seasonings.
Day 1 – 7:00 p.m. – Second set of stretch and folds. – Once done, feed your remaining starter and put the paper towel lid back on. Leave it on the counter if you are baking again tomorrow, or pop it into the fridge and feed it weekly.
Day 1 – 7:30 p.m. – Third set of stretch and folds. – Add your Italian seasoning and shredded cheese. The stretch and folds help distribute it throughout your dough.
Day 1 – 8:00 p.m. – Fourth set of stretch and folds. – Then cover with plastic wrap or a wet kitchen towel. Set in a warm spot in your kitchen to let the dough rise overnight.
Day 2 – 7:00 a.m. – The next morning, before you get cleaned up for work, drop your fermented dough out onto a lightly floured work surface. Shape it and place it into a proofing basket. Cover it with the same plastic wrap, place it inside a plastic bag, and pop it into the fridge for the second rise. You are going to let this ferment for the rest of the day. Placing it in the fridge slows down the fermentation so it doesn’t over ferment.
Day 2 – 6:00 p.m. – Change into your P.J.’s, as it’s TIME TO BAKE: preheat your oven to 450 with your Dutch oven inside (with the lid off). Once the oven is ready, flip your dough out into a piece of parchment paper, add your decorative scores, then your expansion score. Cover the dough in the Dutch oven and bake for 30 – 35 minutes. Remove the lid and bake for an additional 18 – 20 minutes. Check the internal temperature of your dough; you want to reach at least 204°F to ensure it’s baked through.
Day 2 – 8 p.m. – Your loaf of bread is out of the oven and cooling. TRY not to cut into it for a couple of hours. If you cut into it right away, be prepared for a bit of a gummy bottom. This happens, but hey, it’s the price you pay for warm bread fresh from the oven, haha.
I give you some additional baking tips and your Dutch Oven in the video. Like adding a baking sheet to the rack under the bread, to cut down on a dark brown bottom on your loaf.
Storing your homemade sourdough:
That’s like asking how to store left over wine! haha…
We have never had a storage issue in our house, because this bread never makes it to day 3, haha.
HOWEVER, you can store it in zip-lock bags on the counter for up to 5 days.
FREEZING:
Our preferred storage method for our sourdough bread loaves is to slice them up, wrap them in plastic wrap, place them in a plastic bag, and pop them into the freezer. They’re good in the freezer for up to 3 months.
TIP: You can pop a frozen piece into the microwave for 20 – 30 seconds, and it’s perfect for eating or toasting.
Equipment
- large glass mixing bowl
- Spatula
- wooden spoon
- kitchen scale
- bowl scraper
- Dutch Oven
- Banneton/proofing basket
- razor blade for scoring
Ingredients
- 150 grams Bubby fed starter about 10 tbsp or 7/8 cup
- 350 grams warm water about 1-1/2 cups
- 500 grams unbleached bread flour about 4 cups
- 10 grams sea salt about 1 tbsp
- 3 grams dry italian seasoning about 1 tsp
- 4 grams dried basil about 1 – 1/8 tsp
- 125 grams shredded cheddar and Parmigiano Reggiano cheese about 3/4 cup
Instructions
- Day 1 – 7:00 a.m. Feed your Starter: – try a 1:2:2 ratio (or higher) to slow down the process a bit. You want your starter to peak about the time you get home from work. Feeding and the room temperature in your home will affect this.
- Example: I feed at 8 a.m. and start mixing my dough at 4:00 p.m. I feed a 1:1:1 ratio. Our house is around 70°F, and it usually takes about 8 hours to hit the peak. Adding additional flour and water (ex. 1:2:2 ratio) slows this down a bit and can get you to 6:00p.m. – 7:00 p.m.
- Day 1 – 6:00 p.m. – Mix your dough. Add your active starter to a large mixing bowl, then your warm water. Mix until combined. Add your flour and salt. Mix to a shaggy round ball, cover, and let sit for 30 minutes.
- Day 1 – 6:30 p.m. – First set of stretch and folds. – Once done, shred the cheese and measure out the Italian seasonings.
- Day 1 – 7:00 p.m. – Second set of stretch and folds. – Once done, feed your remaining starter and put the paper towel lid back on. Leave it on the counter if you are baking again tomorrow, or pop it into the fridge and feed it weekly.
- Day 1 – 7:30 p.m. – Third set of stretch and folds. – Add your Italian seasoning and shredded cheese. The stretch and folds help distribute it throughout your dough.
- Day 1 – 8:00 p.m. – Fourth set of stretch and folds. – Then cover with plastic wrap or a wet kitchen towel. Set in a warm spot in your kitchen to let the dough rise overnight.
- Day 2 – 7:00 a.m. – Drop your fermented dough out onto a lightly floured work surface. Shape it and place it into a proofing basket. Cover it with the same plastic wrap, place it inside a plastic bag, and pop it into the fridge for the second rise. You are going to let this ferment for the rest of the day. Placing it in the fridge slows down the fermentation so it doesn't over-ferment.
- Day 2 – 6:00 p.m. – TIME TO BAKE: preheat your oven to 450 with your Dutch oven inside (with the lid off). Once the oven is ready, flip your dough out into a piece of parchment paper, add your decorative scores, then your expansion scores. Cover the dough in the Dutch oven and bake for 30 – 35 minutes. Remove the lid and bake for an additional 18 – 20 minutes. Check the internal temperature of your dough; you want to reach at least 204°F to ensure it's baked through.
- Day 2 – 8 p.m. – Your loaf of bread is out of the oven and cooling. TRY not to cut into it for a couple of hours. If you cut into it right away, be prepared for a bit of a gummy bottom. This happens, but hey, it's the price you pay for warm bread fresh from the oven, haha.
Visit my Amazon page, where I list the products I love to use in my kitchen:
Compensated affiliate links used were available at no cost to you. View my Disclosure Page here:


- Follow me on INSTAGRAM
- Find me on FACEBOOK
- Subscribe to my YOUTUBE CHANNEL
- Pin my latest recipes on PINTEREST