How to make a Sourdough Starter
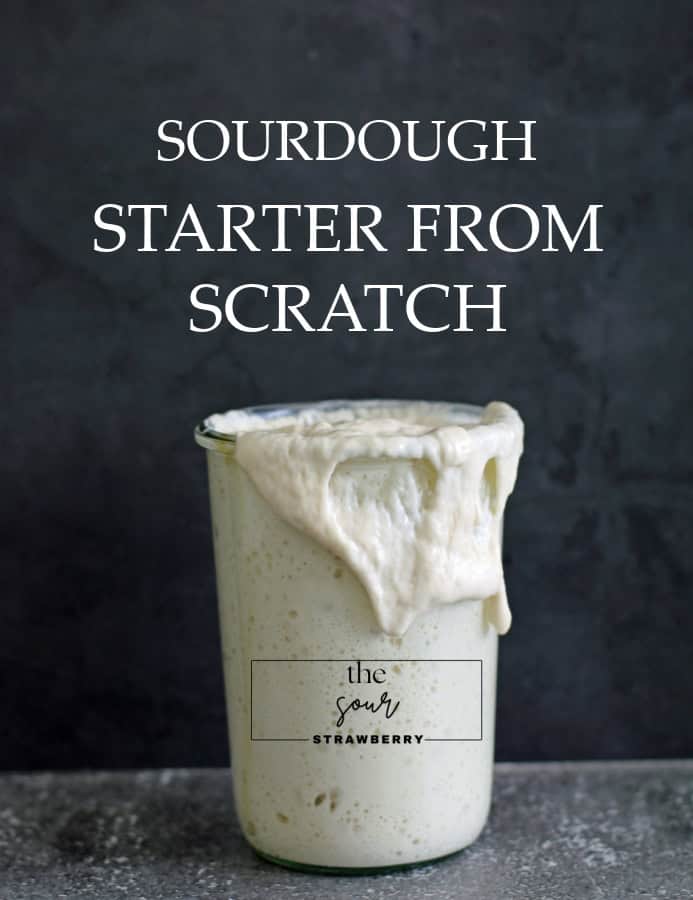
How to make a Sourdough Starter from scratch is simple with my easy-to-follow method. In no time (a couple of weeks), you will be baking the most delicious homemade sourdough bread, bagels, and English muffins for your family and friends.
I’ve been baking Bread with my Sourdough starter for some time now and I have taught many friends and family how to make their starter with this simple recipe.
I still get excited every time I pull a beautiful Boule from my oven. It is such a feeling of accomplishment.
My sourdough journey started out of need. Like many people, I found modern breads tough on the gut, and hard to digest. I live in a small town and the bakeries all use yeast in their sourdough and bake “same day”. So, I learned how to make my own. I adjusted the Sourdough Bread creating schedule to work around my lifestyle, now I’m baking everything from bread to chocolate chip cookies.
By following this easy step-by-step tutorial, you will be well on your way to baking a variety of sourdough recipes for your family.
What is a Sourdough Starter?
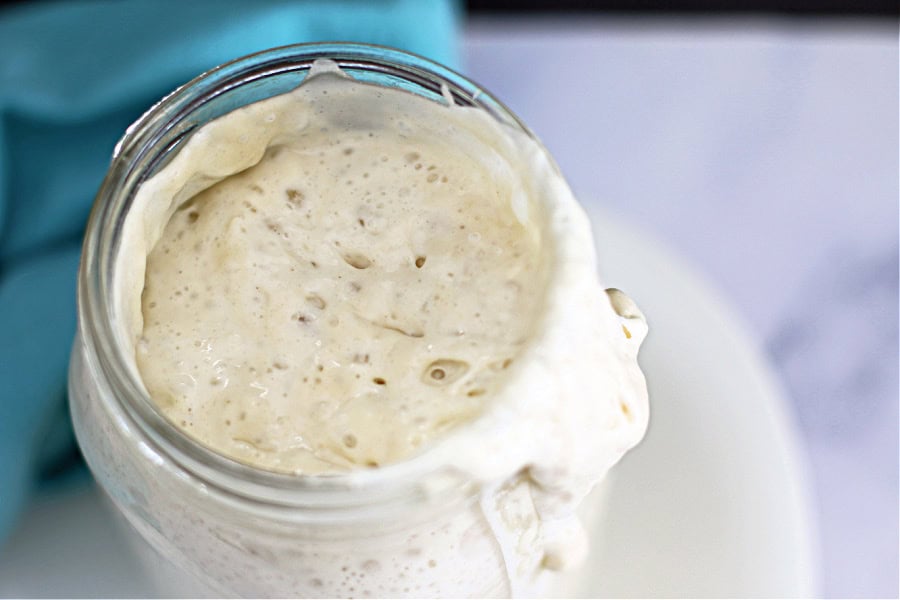
A sourdough Starter is the heart of baking sourdough bread in your home. Without it, your bread won’t rise. Sourdough Starter is a live fermented culture of fresh flour and water. With time, warmth and love, the culture will ferment and cultivate the natural yeasts found in the environment. You need to lovingly care for it with regular feedings and it will reward you with the best tasting (and rising) bread, biscuits, buns, pancakes and more.
How Long does it Take to Make a Sourdough Starter?
It takes about 7 – 14 days of regularly feeding your starter to get it going from scratch. Only about 5 minutes a day, so don’t stress it. BUT, if you have a friend who bakes sourdough, ask them for 50g of theirs to get you going.
There are a few factors that will affect your time process, temperature being key. Your starter likes to be warm – 75 – 80 (24 – 26C) is ideal for your new temperamental baby, but you can still grow great starter with lower temps. it just takes a little longer.
NOTE: I live in the Rocky Mountains where it is very cold in the winter months and I created new starter with no issues, even though some times we have a hard time keeping our house at 70 (21C).
The Science:
Sourdough Starter is combining flour and water and allowing it to ferment. This creates a living culture of wild yeast and lactic acid bacteria that we use to make bread rise.
Sourdough Bread has a tangy, slightly sour taste as a result of the fermentation process in creating sourdough.
The fermentation process in sourdough breaks down the gluten making it easier to digest for those of us with sensitive tummies. (sorry gang, it does not remove the gluten from the bread).
What you Need to get Started:
Flour and water – that’s it!
Kidding, you also need a jar, your starter needs a home. A kitchen scale and some patience.
About the Jar – or new home for “Clint Yeastwood”.
The size and shape of your starters abode is important. You want one with a wide opening. You have to get the flour in there without too much mess. You also need to get a cloth and your hand in there on those “housecleaning days”, so pick wisely. I like a wide mouth mason Jar (canning jar) and Weck Jars, both of nice wide openings.
Let’s discuss water.
Bottled, filtered and tap water can all be used to create your starter. To remove chlorine from your tap water, simply fill a jug with water and let it sit for 24 hours uncovered. If your city uses Chloramine to clean the tap water, you may need to consider using bottled water. I use Brita filtered water.
Unbleached, All-Purpose, White Flour:
I usually feed with unbleached, all-purpose, white flour (or bread flour). It’s been my go-to for years with its gas-trapping ability and gluten strength, it shows me the fermentation signs.
Rye Flour – Whole Wheat Flour
Sometimes, your white flour needs a little boost to get going. Adding about 30% whole grain flour will give your fermentation a lift, but don’t use more than that, or you could cause your starter to get acidic.
TOOLS To help you to Sourdough Starter Success:
There are a few essential tools you need to make a sourdough Starter.
Container to home your starter: I like using glass jars, they are easy to clean and to see through. You can also write on them with a sharpie. Mason Jars, Weck Jars, or food-grade plastic containers all work. I’ve added some recommendations at the end of this post for you.
Cover for the container. your starter needs to breath so covering with a cheesecloth, kitchen towel or paper towel allows the circulation of air while keeping out contaminants. A loose-fitting lid also works.
A marker for the side of your container. A Rubber Band works, I use masking tape so I can write on it. It assists in showing you the feeding start, and the rise. I also write the feeding time on it so I can record how long it takes to fully rise (this will change throughout the seasons).
A digital Thermometer – to monitor the temperature in your room, and your starter, and you will also be using it to check the internal temp. of your cooked bread.
A Kitchen Scale to assist in accuracy when measuring ingredients in your bread making journey.
A Jar Spatula for mixing ingredients and cleaning the sides of your jar. The silicone is sturdy, easy to clean and heat resistant to 600°F
3 Easy Steps to Creating a Sourdough Starter
Start by picking a time you can consistently fit into your schedule, morning or night. To start you will feed your starter once a day. As it becomes more active this may increase to twice a day. setting up a schedule will help you be successful and once you are comfortable with the feedings, it will only take about 5 minutes a day.
Day 1:
Weigh your jar (without the lid) in grams with your new kitchen scale and write the weight on the bottom of the jar with a sharpie. – don’t skip this step, it’s very important. We need the baseline weight for each feeding.
- Add to your jar 120g un-bleached all purpose flour and 120g water (or 1 cup of flour and 1/2 cup of water).
- Stir the water and flour together until all the flour is wet and there are no dry clumps.
- Cover the container with a loose lid, cheesecloth or paper towel, secured with a rubber band to keep out contaminants.
Place the container in a warm location, 72 – 75 (24°C) degrees for 24 hours.
Day 2:
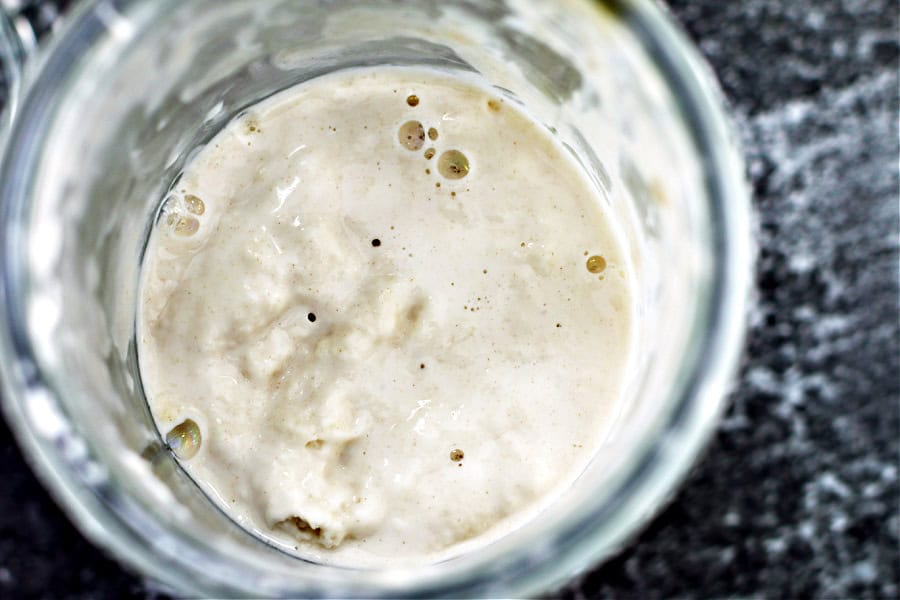
Stir your starter to incorporate some air, you may see some bubbles, this is an indication that your starter is fermenting. Or you may not see bubbles as they may have appeared overnight. Cover the jar again and let it rest for a further 24 hours in your warm spot.
Days 3 through 14
Remove and discard about 1/2 of the sourdough starter. There should be around 50 – 80g remaining. Feed it with 60g Flour (1/2) cup) and 60g (1/4 cup) water. Stir with a wooden spoon. The texture should be like a thick pancake batter. Cover and place it in your warm spot for 24 hours.
It’s time to start feeding your starter daily. As the natural yeasts develop you will see more bubbles and your starter will rise. Then your starter will fall back down indicating it’s time to feed it again.
Establish a Feeding Schedule for You and your Starter.
- I feed my starter each morning at 7:00. This has trained me to remember to feed it daily. My starter also rises and falls at roughly the same time (depending on temperature). So, I have learned when it peaks and the best time to use it to bake.
- Keep a Diary: Mark your starter with masking tape after you feed it for a visual of the growth. Write the feeding time on the tape to track how long your rise takes, and track that in your diary. This will help with your baking schedule down the road.
- Be patient. This is a slow process. Be consistent with your feedings and you will be rewarded.
Your Sourdough Starter is ready:
By now you should have a nice active bubbly starter that will double in size within 4 – 12 hours of your feeding it. It should smell pleasant, and the texture should be soft and spongy. If your house is cooler, this may take a few more days.
Move your starter to a clean new jar and you are ready to bake.
Maintaining your Sourdough Starter:
Now that you have an established starter, maintaining it and baking with it is simple. Feed it the day before you want to bake, otherwise, store it in the fridge, and feed it once a week. It hibernates in the fridge, so you can actually go much longer than a week without feeding it, for example if you are going on holidays.
If your going to do lots of baking, don’t discard, so you have more starter to use, or start a second jar with your discard, and feed it for your additional baking. You always want to ensure that you have around 50g of starter left over.
How to tell of your starter has gone bad?
If your starter has been in the fridge for awhile and has a liquid on top, it’s hooch. A naturally occurring alcohol. Simply pour it off before you feed your starter.
BUT – if your starter is growing mold? It has orange or pink spots or streaks in it? It smells terrible, instead of that lovely tangy sweet scent. It has gone bad and you need to throw it out.
Be Prepared for a Starter Mishap:
Freeze some of your starter in a jar in your freezer. Make sure to date it so you know how long it’s been in there. Frozen starter lasts about 12 months.
Dehydrate some of your active starter and store in an airtight jar. Dehydrated starter can last for years.
I have both of these, just in case. I rotate both every 6 months to keep them fresh.
Tools I Recommend

Let’s make some Sourdough Bread:
How to make a Sourdough Starter
Equipment
- 1 glass jar
- 1 digital kitchen scale
- 1 silicone spatchula
- 1 glass measuring cup (2 cup size)
- 1 glass flour container
Ingredients
- 120 g un-bleached all purpose flour
- 120 g warm water
Instructions
- I have videos for each of these steps on my blog here: https://thesourstrawberry.com/how-to-make-a-sourdough-starter/DAY #1Using a kitchen scale, place your jar on top to get the weight in grams, and mark it on the bottom of the jar with a sharpie.
- 0 out the scale (tar), place the jar on the scale and 0 out again. Add 120 g of flour and 120 g of warm water. Mix until all the flour is wet. Cover the jar with a piece of paper towel, secured with a rubber band.Mark the height of the dough mixture on the outside of the jar with a piece of masking tape, with the time written on it.Place the jar in a warm location, 72 – 75 (24°c) degrees for 24 hours.
- Day #2Stir the mixture to incorporate some air, replace the lid and store in a warm spot for another 24 hours
- Days #3 through 14Remove and discard about 1/2 of the sourdough starter. There should be about 60g remaining.Feed it with 60g flour (1/2 cup) and 60g (1/4 cup) water. Stir until all the flour is wet.The texture should resemble thick pancake batter.Cover and place in a warm spot for 24 hours.Feed daily, at close to the same time each day. As the natural yeasts develop you will see more bubbles and your starter will rise and fall, indicating it's time to feed again.When you feed, mark the side of the jar with masking tape with the time written on it. This way you can record how long it takes your starter to peak and you have a visual of it happening. This information is helpful when you start to bake. The peak times will change throughout the seasons as the temperature in your house changes.
- NOTE:for these first 14 days, DO NOT use your discard to bake with. It could make you quite sick.